Note from Geordie: I asked Google Analytics expert and PPCblog member, Stephanie Brachat, if she would blog three ‘hacks’ for properly tracking PPC campaigns in Google Analytics. The following are her favourites, Thanks Steph!
Sourcing Your adCenter Traffic as ‘CPC’ and Not ‘Organic’
Are you running PPC campaigns on both AdWords and adCenter? Ever wonder why Google Analytics shows “bing (organic)” and “yahoo (organic)” but no ‘cpc’ traffic data for anything other than Google?
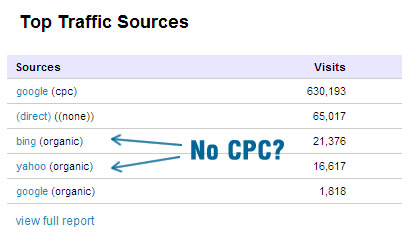
While Google automatically splits out their own traffic between paid and not-paid by default, anything coming from adCenter falls under the organic umbrella. You’ll need to manually tag this traffic to track it correctly.
For anyone who hasn’t used manual tagging, it’s simply a matter of appending your destination URL with Google friendly parameters. The only difference in this case is that instead of static values, we’ll get adCenter to dynamically pass the keyword data.
So, here’s what you need to do:
Head on over to Google’s URL builder and fill out the form as below:
- Website URL: http://www.mysite.com/product/lp1 *my landing page
- Campaign Source: adcenter *I opt to use adcenter instead of Bing, as some traffic could be Yahoo too
- Campaign Medium: cpc
- Campaign Term: keyword
- Campaign Content: *this field is optional, in my example I left it blank
- Campaign Name: myCampaignName *pick something relevant
IMPORTANT: AFTER you generate your URL, make sure to add curly brackets around ‘keyword’, as you don’t want these brackets encrypted when you paste them into adCenter… you want your URL to look like the version below as {keyword} is the adCenter parameter that passes your keyword.
In this example, the resulting URL was:
http://www.mysite.com/product/lp1/?utm_source=adcenter&utm_medium=cpc&utm_term={keyword}&utm_campaign=myCampaignName
Now all you’d need to do would be to head back to adCenter and update my destination URLs to ones with the new schema:

and bingo… soon afterward you’ll see adCenter traffic and data showing up under ‘adcenter/cpc’ and accurate info on the paid keywords driving it.

Yes, it’s true you could extrapolate the paid/unpaid traffic ratio directly from your adCenter account stats, but if you’re looking to spot deeper traffic trends and patterns, it’s really invaluable to have this data properly segmented within Google Analytics.
Annotations
How many times have you been looking back at historical data, only to see a huge spike or valley and not recall what caused it?
Finally, there’s help for that… Google now allows you to annotate your data.
Here’s what it looks like:
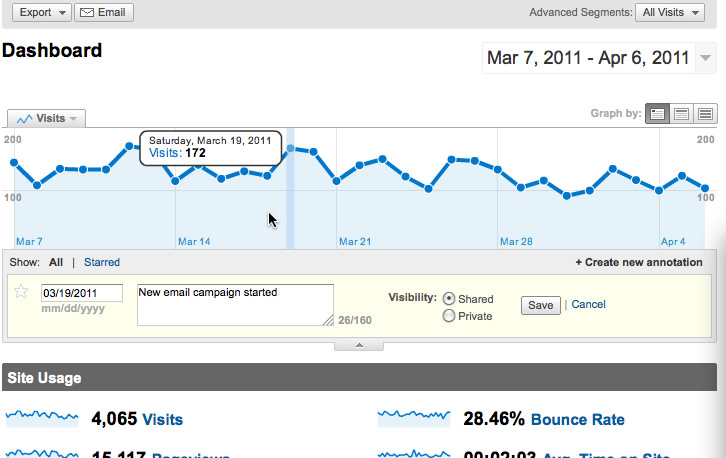
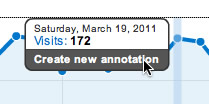
To add an annotation, simply select a data point on your graph, then, in the data bubble that appears, select ‘Create new annotation…’
Another pane subsequently appears, allowing you to type a note and choose whether it’s a private memo for you, or shared with other profiles who access the account. Your graph’s timeline is also updated with a little note icon as shown below.

I find it especially useful to use this feature when I make significant changes to our PPC campaigns. This allows all members of our team to easily tie back traffic fluctuations to alterations we’ve made. Beyond that, it’s really a handy way to note any event that impacts your traffic… server issues, the start of a new email campaign, election day… etc.
‘Not Set’ Visitors
I often get people asking me about “not set” visitors that show in analytics, and where that traffic is really coming from. There’s a few possible reasons for this. Two of the most common are:
- If you’re looking at keyword or e-commerce data, you’ll often see ‘not set’ for traffic that came in from the display network as that traffic isn’t tied to keywords
- Redirections between the ad and your landing page can also cause your Google auto-tagging (and gclid) to be stripped. While Google Analytics still records the visit and the subsequent user activity, it doesn’t have the information necessary to properly attribute the visit to your Google ad.
So, if you suspect it’s redirections causing the issue, how do you confirm if the gclid is being stripped?
1. Grab the ad’s destination URL
2. Create a test link by appending gclid=test to the end of it…
- if your ad destination url is http://www.mysite.com/ your test link would be http://www.mysite.com/?gclid=test
- if your ad destination url is http://www.mysite.com/?myparam=something your test link would be http://www.myste.com/?myparam=something&gclid=test
3. When you arrive at your landing page via the test link, is the gclid=test in the address bar?
- if yes, your redirections are okay
- if no, you may need to make some adjustments so that the gclid id is passed, and/or try manual tagging
As a side note, the tips above were screenshot on the old UI, but are the same process for the new version of GA. If you haven’t tried the updated interface yet, I highly recommend it! On top of the dashboard enhancements, it’s so much quicker, the date selector finally has some shortcuts for relative dates like ‘yesterday’ and they’ve really beefed up the options for event tracking.
Happy data mining!






 There are reports lately of a fresh round of

 Having just recently finished the localization process of some of my English Adwords campaigns into European languages, I thought I’d share some things I learned along the way. After considerable effort and reorganization the campaign is succeeding, but it was fraught with failure and ‘lessons learned’. Hopefully some of my experiences will be helpful if you’re thinking of translating your campaigns to target new markets and languages…
 Microsoft dropped a big piece of news last week: they’re bringing their trademark use policies closer to Google’s. In the past Microsoft had a similar policy to Google, but when they took over PPC for Yahoo they adopted Yahoo’s archaic trademark editorial policies.


